Showing posts with label Recipes. Show all posts

Simple and Easy Way to Organize Your Hats

Wednesday, September 27, 2023

My partner has a ton of hats, and for year we would have them on top of each other, hanging on the coat rack or our blanket ladder. I m in my nesting phase so I decided these hats need to organized. This entire project cost me less than $8.00
I picked up these hooks for $3.50 each on Shein. I placed them on the wall with stickers provided. I measured the distance from one to another by placing a hat on hook I already placed. Repeated the process until all the hooks were up.

What do you think, would you try it?

Krofne - Homemade Donuts

Friday, September 22, 2023

Krofe are deep fried to golden perfection with a fluffy, moist center and lightly dipped in sugar.
What you will need:
1.5 tbsp yeast quick rise
2 tbsp granulated sugar
1.75 cups milk divided, warm
3.75 cups flour
5 egg yolks
1 tbsp oil
½ tsp salt
powder sugar for sugar coating

How to make it:
Combine ¾ cup of milk with 2 tbsp granulated sugar. Mix together with yeast. Put aside for time being.
In a large mixing bowl, combine flour and salt. Add the yeast mixture and egg yolks and continue mixing.
Slowly add remaining warm milk.
Mix until well combined on medium speed, about 10 minutes until dough is airy. If dough is too hard, add a bit more milk.
Remove the hook and leave dough to rise. After the dough has risen to twice it’s size, roll it to 1” thick using a rolling pin. (make sure to flour the surface to prevent dough from stickig)
Dip the rim of a drinking glass in flour and cut the rolled out dough.

Frying the Donuts
Use a deep frying pan, heat the oil on low heat.
Test the oil using a piece of dough by placing it in the oil. If oil bubbles or fizzes, then oil is ready.
Transfer the donuts into the hot oil.
Cook for about 2-3 minutes and flip them over. Cook the other side for about 2-3 min.
Remove and place on paper towel lined plate to absorb the excess oil.
Coat the donuts in powder sugar. Serve and Enjoy


4 Kitchen Gadgets That Will Help You Create Culinary Masterpieces

Tuesday, April 19, 2022

If you're looking for a way to take your cooking skills to the next level, you need to check out these kitchen gadgets! These tools will help you create culinary masterpieces that will amaze your friends and family. From a garlic press to a spiralizer, we've got you covered. So what are you waiting for? Check out our list of must-have kitchen gadgets and get cooking!

Photo by Engin Akyurt: 

1) A Garlic Press:

A garlic press is a must-have tool for any home chef. With this gadget, you can efficiently mince garlic cloves in seconds. This is a great time-saver if you're making a dish that calls for minced garlic. Simply put the cloves into the press and squeeze! You'll have perfectly minced garlic ready to be used in your recipe.

If you don't have a garlic press, you can use a knife to mince the garlic by hand. However, this takes more time and can be tricky to get the right consistency. A garlic press is definitely worth the investment if you want to make cooking easier. Pressing fresh garlic into your dishes saves time and gives them a more intense flavor. There's no need to use jarred garlic when you have a garlic press at your disposal.

2) A Spiralizer:

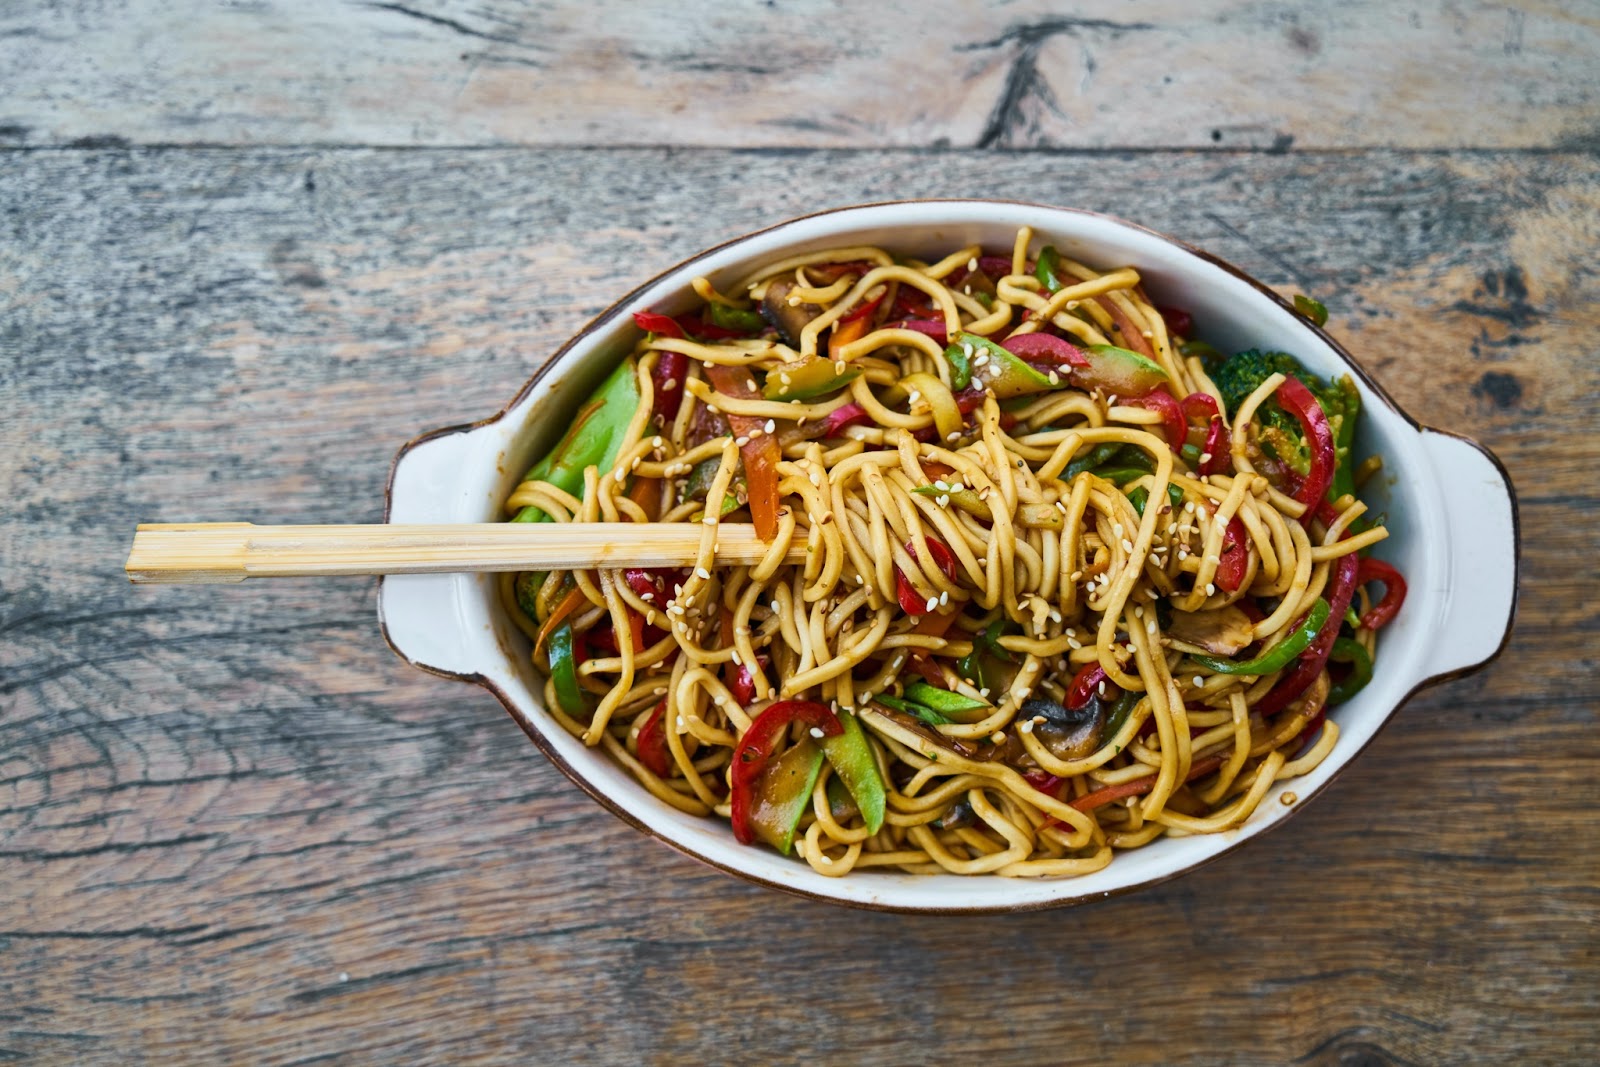
A spiralizer is a kitchen gadget that allows you to turn vegetables into noodles. This is a great way to get your daily veggies while also enjoying a delicious, drunken noodles recipe. A
ll you need to do is insert the vegetable of your choice into the spiralizer and twist! In seconds, you'll have perfectly spiralized noodles ready to be cooked.

If you're trying to eat healthier, then a spiralizer is a great tool to have in your kitchen. With this gadget, you can make veggie-packed dishes that are low in calories but high in flavor. You can also use a spiralizer to make zucchini noodles, which are commonly known as "zoodles."


3) A Food Processor:

A food processor is a versatile kitchen gadget that can be used for various tasks. You can quickly chop, slice, and dice vegetables with this tool. You can also use it to make sauces, dips, and spreads. If you're looking for a time-saving appliance, then a food processor is worth considering.

One of the great things about owning a food processor is making your baby food at home. Simply puree some fruits or vegetables, and voila! You've got healthy, homemade baby food free of preservatives and other additives. Plus, it's much cheaper than buying store-bought baby food.


4) A Slow Cooker:

A slow cooker is a kitchen appliance that can cook food for longer. This is a great way to make hearty, comfort foods like stews and soups. Simply add all of your ingredients into the slow cooker and let it do its job!

One of the best things about slow cookers is that they're very low-maintenance. Once you've added your ingredients, you can simply set it and forget it. This leaves you free to do other things while your food cooks. Plus, slow cookers are very energy-efficient so they won't increase your electricity bill.

These are four kitchen gadgets that will help you create culinary masterpieces. These tools will make cooking more accessible and fun, from a garlic press to a spiralizer. So what are you waiting for? Get out there and start cooking!


Cookie Fudge

Friday, November 5, 2021

 
Holiday season is upon us so I have been in baking mode. I made this fudge in middle of Summer (because after 2020+2021 we all deserve treat whenever the heck we want. This cookie butter fudge is SO good and its great for gifting as well. 
What you need:
1 pound white cholate (chopped)
1 1/2 cups creamy cookie butter 
1/2 teaspoon salt
2 tablespoons molasses
Sprinkles or decorations of choice
 
How to make it:
Line a 8 in banking dish (square or round) with foil, leaving a 2 in overhang on the sides and lightly coat with cooking spray.
Bring 1 in of water to simmer in a medium sauce pan over medium heat.
Combine the chocolate, cookie butter and salt, set it over the water (double boiler style). Cook while chocolate melts and the mixture is smooth and combined. 
Remove the bowl from the pan and stir in molasses.
Spread the mixture evenly in the prepared baking dish.
Let set at room temperature for about 2 hours, than cover with cellophane and put in the fridge for 30 minutes.
Using the overhang lift the fudge out and cut.


Fruit and Nut Chocolate Fudge

Friday, October 29, 2021

The cookie butter fudge I made while back was so a hit I decided to make another one. This is a perfect treat for the holiday and it holds well, plus it also makes great gifts.
What you need:
2 table spoons unsalted butter
1 pound chocolate chips
14 ounce can sweetened condensed milk
1/4 teaspoon salt
1/4 cup chopped roasted pistachios
14 cup chopped almonds
1/4 cup chopped dried apricots
1/4 cup chopped dried cranberries
How to make it:
Line a 8 in banking dish (square or round) with foil, leaving a 2 in overhang on the sides and lightly coat with cooking spray.
Combine the condensed milk, chocolate, butter and salt in a microwave safe bowl. 
Microwave 1 minute, stir well and continue microwaving in 15 second intervals until fully melted.
Fold the nuts and dried fruits in.
Pour the mixture into the prepared baking dish
Cover with plastic wrap and refrigerate until firm (about 2 hours) or overnight. 
Using the overhang lift the fudge out and cut.

Lady Finger Mascarpone Cheese Cake

Friday, October 22, 2021

Ever bake something and it gets eaten before you take proper photos of it? Yeah me neither. I made this cake for my dads birthday and I didn't get to take any good photos but it was SO good, I thought I share anyways .
What you need:
One box lady fingers
 Mascarpone cheese (one tub 450g) 
 2 cup heavy whipping cream, 
1 tub of strawberries sliced 
1 cup sugar, 
2 teaspoon vanilla extract,
5 tablespoons powdered sugar 
2 tablespoons balsamic vinegar 
How to make it:
Cut off the end of some of the lady fingers so they can stand up straight.

Slice strawberries, I put half of them in 2 tablespoons of balsamic vinegar and half in a bowl with 3 tablespoons of powdered sugar. Place the other in a separate bowl with 2 tablespoons of powered sugar.

In a mixer bowl beat the mascarpone cheese on slow until it's smooth then add 2 cups heavy cream, 2 teaspoons of vanilla extract and 1 cup sugar and mix until it's nice and fluffy.

In a circle pan (if you have one of those where the edges are removable), line the sides with lady finders (flat end down you cut), than line the bottom of the pan with ladyfingers. You will have to cut to make them fit.

Add a layer of mascarpone cheese mix, than balsamic strawberries, then just a little more mascarpone mixture. Then layer with lady finders and add mascarpone cheese mix, lawyer of sugared strawberries and all the mascarpone mixture on top. 

Cover with cellophane and let it in the fridge for at least 2 hours.

When ready to serve top with more strawberries and whipped cream


Spiced Nuts

Friday, October 1, 2021

The weather is getting a little chillier and that automatically means holiday baking. If I am being honest I make these year round but they are a little more sweet around the holiday. 
What you need:
1 egg white
1/4 cup light brown sugar
2 tsp ginger spice
1 tsp salt
1/2 tsp paprika
1/2 tsp pepper
1/3 cup pecans
1/3 cup almonds
1 cup sesame sticks
How to make it:
Preheat over to 325.
Wish egg white and the brown sugar, ginger spice, salt, pepper and paprika. 
Toss in the almonds and walnuts.
Spread on a baking sheet and a bake for 25 minutes, stirring every 10 min.
Add sesame sticks in last 5 min of baking. Let cool and enjoy


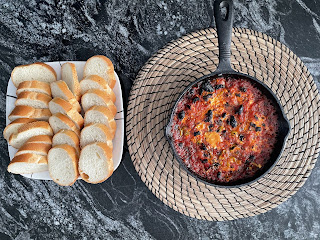
Best Baked Dip

Friday, September 24, 2021

This might be my new favorite things. It simple to make and its delicious. I think I originally seen this on TikTok but could not find it to give them credit. This is a huge hit every time I make it. 
What you need:
200g of feta cheese
10 Kalamata Black Olives ·
10 Cerignola olives (or any green olives)
1 can of tomato sauce
1 tsp Salt
1 tsp Pepper
2 tsp Olive Oil
1 tsp Red chilly flakes
1 tsp Oregano
2-3 cloves garlic 
How to make:
Preheat oven to 375.
In a cast iron pour olive oil, and than tomatoes sauce.
Place shopped up olives, garlic and seasonings.
Stir and place feta cheese in the center.
Drizzle with olive oil and salt and pepper.
Bake for 35-40 minutes.
Serve with a toasted baguette.


Instant Pot Chicken Noodle Soup

Friday, September 17, 2021

I love soup, and with days getting colder this is a perfect recipe. An easy recipe for Instant Pot Chicken Noodle Soup, perfect for cold winter days! This delicious chicken soup is quick and easy to make in your pressure cooker. 
What you need:
3-4 skinless chicken breasts
1 tablespoon olive oil
1 medium onion (chopped)
4 medium carrots (chopped)
4 ribs celery (chopped)
3 cloves garlic (minced)
1 teaspoon dried oregano
½ teaspoon dried thyme
1 bay leaf
¾ teaspoon salt (or to taste)
¼ teaspoon black pepper
4 cups low sodium chicken broth
2 cups water
6 ounces egg noodles
How to make it:
Press the sauté button on the Instant Pot and add the olive oil to the pot. Once the pot is hot, add the onion, carrots and celery and cook, stirring occasionally, until veggies start to soften, about 3 minutes. Stir in the garlic. Press "Cancel" to turn off the Instant Pot.

Add the dried oregano, thyme, bay leaf, salt, pepper, broth and water to the pot. Stir. Nestle the chicken into the broth.

Close the Instant Pot lid and turn the valve to the sealing position. Pressure cook on high pressure for 7 minutes. The Instant Pot will take about 20 minutes to reach pressure and then the cook time will begin counting down.

When the cook time ends, allow the Instant Pot to naturally release for 10 minutes. Then, carefully release the remaining pressure by turning the steam release valve to the venting position using the handle of a long spoon.

When the pin drops down, open the Instant Pot lid. Remove the bay leaf and discard. Remove the chicken to a clean plate, bowl, or cutting board. Let the chicken rest for a few minutes and then shred the chicken.

Press "Cancel" to turn off the warm setting and then press "Saute." Add the noodles to the pot and let them simmer for about 5 minutes, until just tender. Turn the Instant Pot off.

Stir the shredded chicken back into the soup. Taste soup and season with additional salt and pepper as needed. Serve soup with fresh parsley, if desired.

*Originally this recipe was in the book that came with my instant pot.
DESIGNED BY ECLAIR DESIGNS